Installation
Bimo packages are not currently published on npm simply because it is not necessary at this time. Bimo is a monorepo, and all projects currently using Bimo are forks of the public monorepo. Once there is demand, we will start publishing the packages on npm. Feel free to ask us! In the meantime, to use Bimo packages, the best way is to create your own fork.
If you are an experienced developer comfortable with the Node.js/JavaScript ecosystem, the summary instructions below should suffice. Otherwise, continue reading the detailed instructions.
Summary instructions
- Fork and/or clone the repository to your computer
- Run
yarn install
We use yarn rather than npm as a package manager, particularly for workspace management. You can try using another package manager of your choice, but it will likely require some adjustments.
- Run
yarn build:allto compile the packages written in TypeScript - Run
yarn test(ornpm run test) to execute automated tests - if they pass, everything is working fine!
Detailed Instructions
Prerequisites
- Install git
- Install Node.js
- Install a code editor of your choice. We recommend Visual Studio Code
Fork the Repository and Get the URL
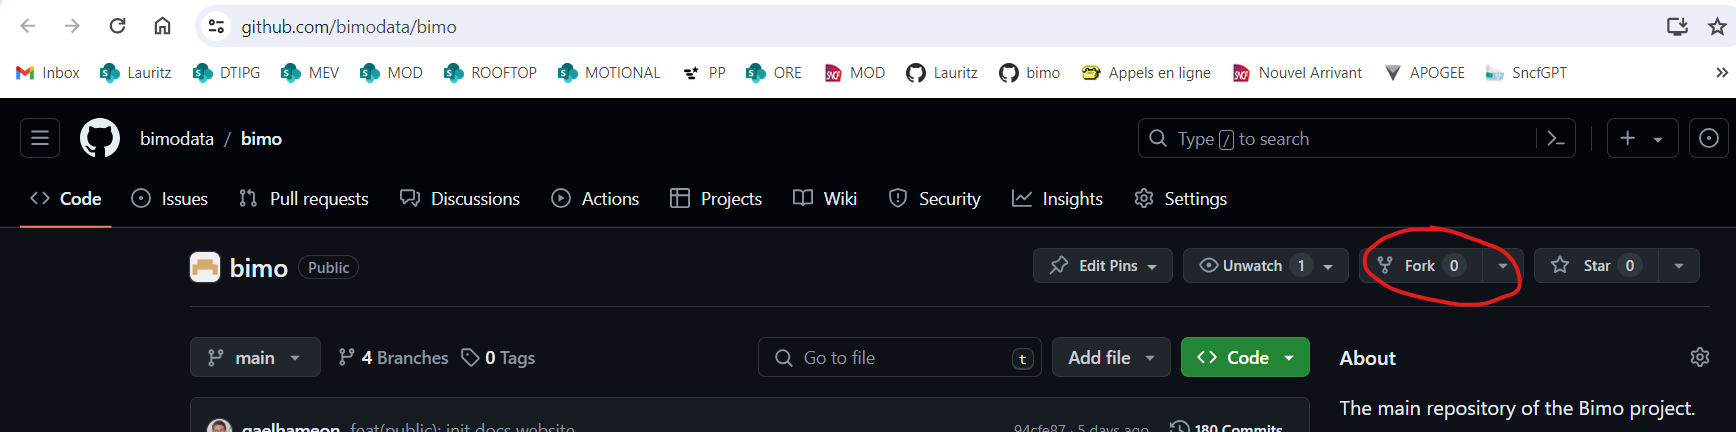
From the project's GitHub page, click the Fork button and follow the instructions to create a fork associated with your GitHub account.
Then retrieve the URL of your fork:
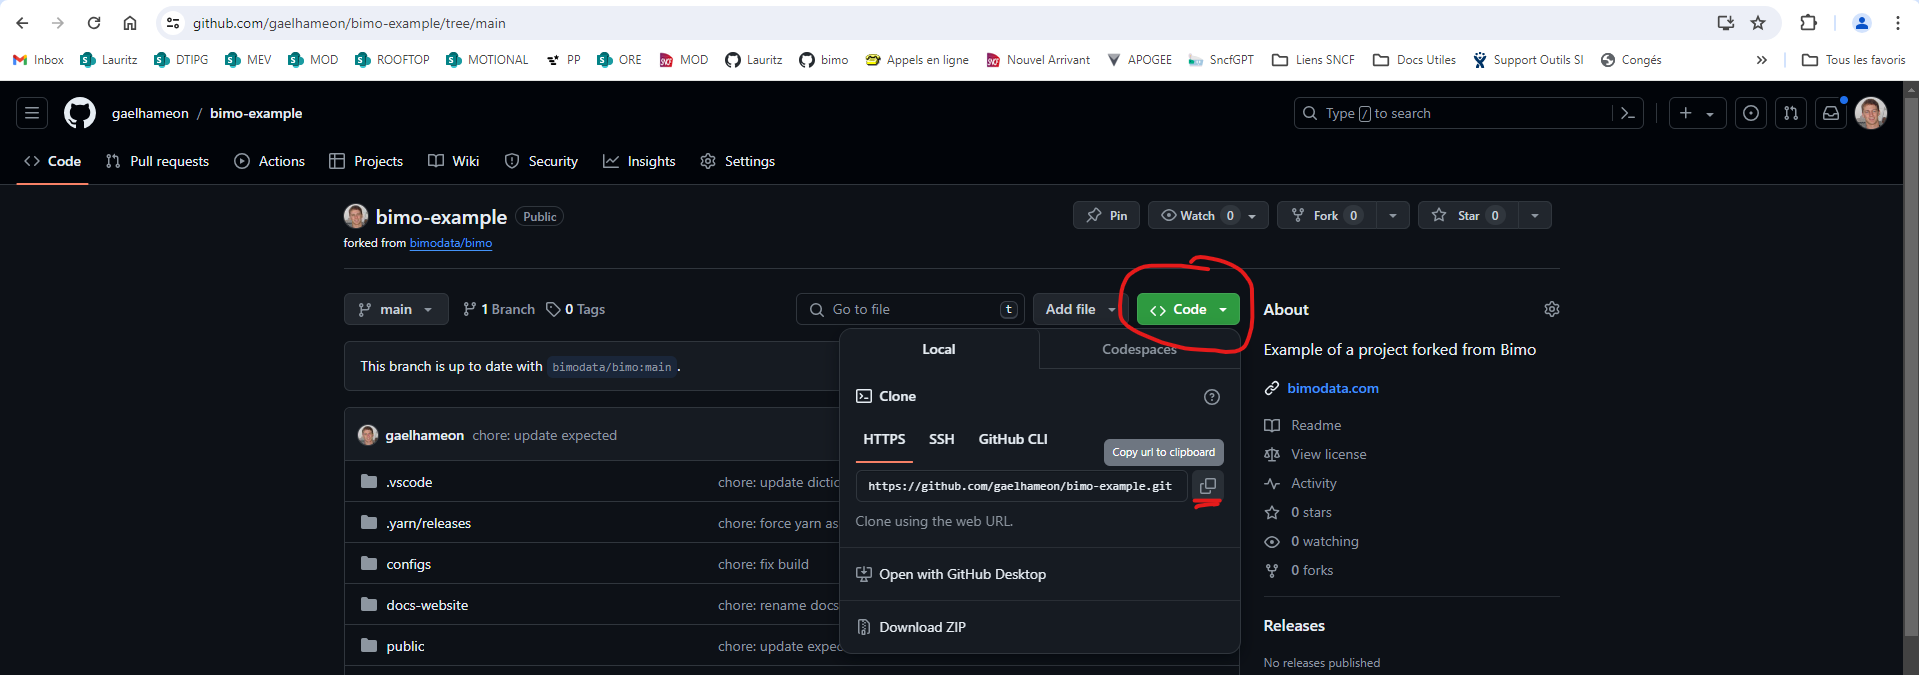
If you don't want to create a GitHub account, you can simply use the public repository URL directly: https://github.com/bimodata/bimo.git. However, note that it will be more complicated to push your modified code back to GitHub for saving or sharing with other users.
Clone the repository to your computer
For this step, you will need access to a terminal window. There are several options, but we will use the integrated terminal in Visual Studio Code.
- Launch Visual Studio Code
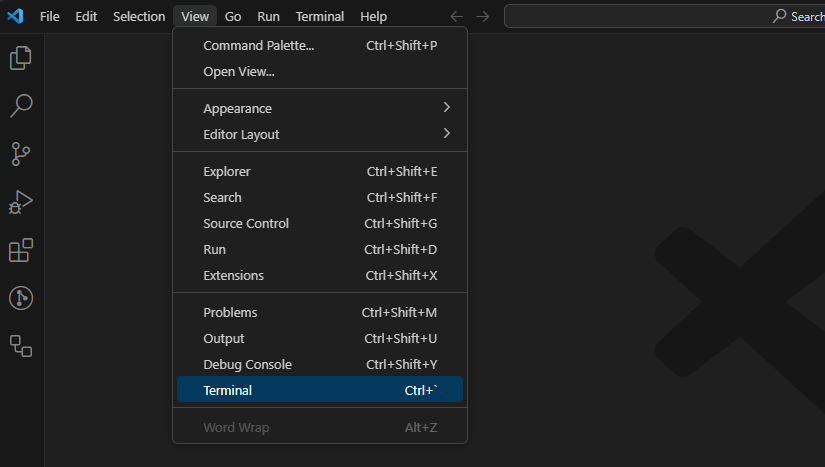
- If the terminal is not visible, use the menu
View > TerminalorTerminal > New Terminalto open the integrated terminal.
The terminal opens at the bottom of the window, and the current folder is your username's folder:
![]()
- Navigate in this terminal to a folder where you want to store your development projects. If you don't have one, you can create a
devfolder:
mkdir dev
cd dev
The mkdir command (make directory) creates a subfolder in the current folder.
The cd command (change directory) navigates to the specified folder.
- Use the
git clonecommand with the URL obtained in the previous step to clone the repository:
git clone https://github.com/gaelhameon/bimo-example.git
The repository is then cloned into a subfolder named after the repository (bimo-example in this example).
- Use the
code <path to folder>command to open the subfolder in a new Visual Studio Code window:
code .\bimo-example\
You should see a new window with the project file structure on the left side:

Install Dependencies
As of this writing, I am not sure if you still need to install Yarn globally before using the "local" versions included in projects. If the commands below do not work, first try the command npm install -g yarn and/or follow the Yarn installation instructions.
Run the command:
yarn install
and wait... The installation should end with a line resembling:
➤ YN0000: · Done with warnings in 35s 105ms
Compile TypeScript Packages
Run the command:
yarn build:all
and wait. The compilation should end with a line resembling:
Done in 26s 172ms
Run Unit Tests
Run the command:
npm run test
and wait. The tests should end with lines resembling:
426 passing (2s)
5 pending
If the tests worked, it's a good sign that everything installed correctly!
Create Your First Script
- Create a
script-test.jsfile at the root of the project. Copy the following lines into this file:
const { VehicleSchedule } = require('@bimo/core-entities');

const myVsc = new VehicleSchedule({
  vscIntId: 0,
  vscName: 'Test',
  vscDescription: 'A test schedule',
});

console.log(myVsc.longLoggingOutput);
Run the command below:
node ./script-test.js
You should see this line:
0: Test - A test schedule (6) | 0 trips | 0 blocks